

Horadric Strongroom is a new micro-dungeon in Diablo 4 Season 9. It has a chance to appear in each Nightmare Dungeon. The higher the difficulty of your challenge, the greater the chance of your encountering it. In this dungeon, players need to overcome all obstacles and defeat the final boss within the specified time to get rewards.
Here, we will help you optimize your Horadric Strongroom farming efficiency as much as possible to help you get more Horadric Attunement and ultimately get more Diablo 4 runes from the dungeon. To do this, we will tell you which tests should be prioritized at the beginning and which tests should be avoided.
Horadric Strongroom Basic Cycle
Before we start discussing, we must first introduce the basic cycle of Horadric Strongroom that many people don’t know.
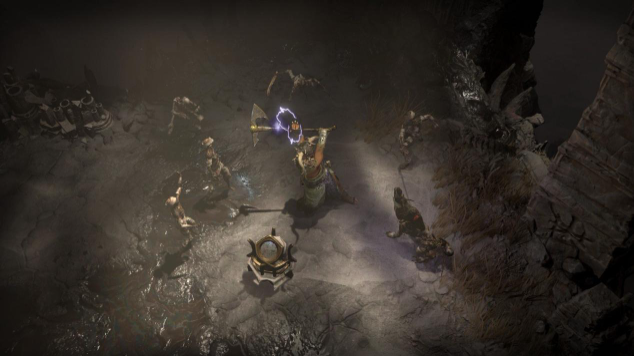
Inside this dungeon, there are two points of interest.
The first point is Horadric Artifact Pillar itself. Click it and a circle will appear, and you need to kill the monsters inside the circle. If you kill enough monsters, you can activate Pillar, which grants you a 15-second buff that increases Attunement you gain from killing any monster.
While you’re running Horadric Strongroom, collecting Attunement will fill up a progress bar on the right side of the screen. So, you want to collect as much Horadric Attunement as possible, because that way you can complete the progress bar as quickly as possible.
Another point of interest in Horadric Strongroom are Shrines. When you click on a Shrine, a wave of monsters will spawn near you, and you can kill them to gain Attunement. This means that as long as your character is strong enough, it only takes a few seconds, and you can harvest a lot of Diablo 4 gold by slashing monsters like crazy, and achieve a rapid jump in Attunement bar.

So, basically, without using any pillar modifiers, here’s what you should do in Horadric Strongroom, which is the basic cycle in this dungeon.
First, you need to click on a Pillar and kill all the monsters around it until it activates and gives you an additional Horadric Attunement buff.
Then, head to and click on Shrines, monsters will spawn around you, and killing them will give you additional Attunements, since you ideally still have the buff from the pillar. You have to repeat this until the progress bar is maxed out.
Simply activate Pillar, travel to Shrines, spawn monsters, kill them, and repeat. It’s that simple.
Choose The Right Test
This is the best way to fill up the progress bar if nothing changes the game environment. However, in most cases, the game environment will change.
As we said before, Horadric Artifact Pillar is the core of Horadric Strongroom, through which you have the opportunity to change the upcoming challenges.
Once you interact with this pillar, the test selection phase will be triggered, which will give you 5 random tests, and you need to choose three of them.
Remember that each test you choose will change the direction of the next Horadric Strongroom challenge, some will make your challenge more difficult, and some will also enhance the effects of the pillar and shrines buffs. Each test has a different rarity, and the higher the rarity, the more effective it is, and the more Attunement you’ll get.
Test Tier List
So, now we’re going to talk about the actual tests you have to choose at the beginning of Horadric Strongroom.
Here, we create a tier list for these tests and rate their usefulness.
- S Tier: Will yield a lot of extra Attunement, you almost always have to choose them.
- A Tier: Will add excitement to your adventure.
- B Tier: Will hardly do any good to your run.
- C Tier: Might even cause damage.
Generally speaking, the best tests are those that barely modify the core gameplay loop we mentioned earlier.
S Tier
Now, let’s take a look at S Tier tests.
When talking about S Tier, two tests immediately come to mind. They are Test of Weight and Test of Doom, both of which increase Horadric Attunement by 25%. In both cases of tests, though, you have to carry an Idol with you.
But in the case of Test of Weight, Idol will drop when you evade. So basically, you can’t evade the entire run.
And if you choose Test of Doom, Idol will drop when you use potion. That is, if you want to maintain this test, you can’t use potions. For this reason, it is recommended that you invest some Diablo 4 gold in your equipment defense stats stack at the beginning of the run to ensure your survivability.
If your character is strong enough, these tests and Idols will greatly increase the speed at which you gain Horadric Attunement and reduce the time you stay in Horadric Strongroom.
Test of Might is also S-tier. When your Horadric Attunement progress bar reaches level three, it will summon a boss, which is Astaroth’s mount.
The reason it’s an S-tier test is that if you can kill the boss, you’ll get a ton of Attunement, and you don’t really need to focus fire on it because if it follows you it will passively die to your ranged attacks and give you a ton of D4 gold and rare loot drops.
A Tier
After completing these, we’ll move on to A Tier. I recommend taking these tests, but not at the expense of S-tier tests.
First up we have Test of Restlessness, which causes nearby Pillars to attract more monsters that you can kill for extra Horadric Attunement.
There’s also Test of the Unsettled, which causes Pillar Events you just completed to attract more Ambushes. This is very useful because you can use these monsters to gain extra Horadric Attunement. Remember, after completing a Pillar you get a buff that increases your chance of gaining Attunement.
Next up is Test of Frenzy, which causes your activated Shrines to attract more monsters that can be used again for more Attunement.
B Tier
Then, we can drop down to B Tier.
For B Tier tests, I would not recommend you to take them unless you have no other possible options.
First, any test that provides Swiftness Motes, I would immediately classify as B Tier. Because this increases your speed, which will result in you killing fewer monsters and thus getting less Attunement. So, any test that provides Swiftness Motes is not worth taking, including Test of Resistance, Test of Movement, Test of the Speed, or Test of Celerity.
Similarly, Test of Efficiency is also a B Tier test, simply because it does not do enough. It makes Pillar Ritual 25% faster, and you will take damage when you are close to the pillar, which basically reduces the time you waste killing enemies near the pillar. However, this 25% of time is not much, and the test will not be much of a benefit in terms of Attunement it brings.
C Tier
Next, we are left with C Tier tests.
The first choice is Test of Wandering, which requires you to run around the arena like an idiot, trying to catch those purple or orange Wisps, and when you catch them, you will get some Horadric Attunement. The problem with this test is that it affects the original cycle of Horadric Strongroom. If you choose it and chase Wisps around, you will actually hurt your farming efficiency.
Speaking of inefficiency, Test of Lure is actually also in the C tier, because it makes you waste time guiding Mummies into the pillars, and the reward is very small.
Of course, there are several tests that we haven’t mentioned here, and they should be between B and A tier. So, if you really have no other test options, you can also try them.
Of course, I must remind you that this test tier priority depends on your character. If your character is weak, then some S-tier tests may not be advantageous to you. For example, if you are playing an Evade Spiritborn build, then choosing a test that cannot evade may not be a good idea for you.
But in general, this test list can help you choose the most suitable test for you to greatly improve your Attunement farming efficiency. Good luck.


